
Electricity is a hidden helper in our homes, powering everything from our lights and fans to our computers and refrigerators. We often take it for granted, but behind every switch and outlet is a careful and complex system of wires. Getting this system set up correctly is crucial for safety and for making sure everything works as it should.
Putting in electrical wiring isn’t just about running wires wherever they fit. It’s a detailed process that starts long before any tools are picked up and follows specific steps to make sure your home is properly and safely powered.
This journey, from the first drawing on paper to the moment your lights flicker on, involves many important stages. Understanding these steps can help homeowners appreciate the skill and planning that goes into bringing electricity safely into their living spaces.
What Happens Before Any Wires Are Installed? (Planning and Preparation)
The wiring process actually begins long before you see any cables. It starts with careful planning and design, often on paper.
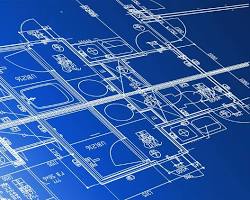
First, an electrician or electrical designer works with the building plans, often called blueprints. They figure out exactly where every light fixture, power outlet, switch, and major appliance will go. This creates a detailed electrical plan that shows all the wiring paths. They need to consider how you’ll use each room, how much power different devices will need, and how to make sure there are enough outlets for convenience.
After the plan is set, the project usually needs permits from the local government or electrical authority. This is a crucial step that makes sure the wiring will follow all the safety rules and building codes in your area. Without proper permits, future inspections or even selling your home can become a problem. It’s also at this stage that the electrician might get special permission to temporarily connect power for tools during construction.
What Are the Main Steps of “Rough-In” Wiring?
The “rough-in” phase is where the real wiring work begins, before any walls are covered up. This stage happens after the main structure of the building (like the wood framing) is complete, but before insulation and drywall go in.
Electricians start by drilling holes through the wooden studs in the walls and joists in the ceilings and floors. These holes are carefully placed to create paths for the wires. They then install electrical boxes—these are the plastic or metal boxes where outlets, light fixtures, and switches will eventually be placed. These boxes are securely fastened to the framing.
Next comes the actual pulling of wires. Long rolls of electrical cable are carefully fed through the drilled holes, from the electrical panel to each of the installed boxes. Each wire needs to be the right size for the amount of power it will carry, and it must be run without damage. All the wires are left with enough length sticking out of the boxes to allow for connections later. This stage also includes running wires for special systems like smoke detectors, doorbells, and sometimes even internet cables.
What Happens During the “Trim-Out” or “Finish” Wiring Phase?
Once the walls are up and painted, and the floors are laid, it’s time for the “trim-out” or “finish” wiring phase. This is when the electrical system really starts to take shape and become usable.
During this stage, electricians return to connect the actual devices you’ll use every day. They carefully connect the wires coming out of the electrical boxes to the light switches, power outlets, and light fixtures. Each connection must be tight and secure to prevent sparks or other hazards. They also install things like ceiling fans, smoke alarms, and other electrical appliances that are part of the permanent structure.
At the main electrical panel (sometimes called the breaker box), all the individual circuits are neatly organized and connected to circuit breakers. These breakers are important safety devices that automatically shut off power if there’s an overload or a problem, protecting your home from electrical fires. The main power lines from the outside are also connected to this panel, completing the entire system.
What Inspections and Final Checks Are Needed?
Before the power is fully turned on and your home is truly “bright,” several crucial inspections and checks happen to ensure everything is safe and up to code.
There’s usually a “rough-in” inspection conducted by a local electrical inspector. This happens after all the wires are pulled through the walls and ceilings but before the drywall goes up. The inspector checks that all wiring runs, box installations, and safety clearances meet the strict building codes. This is a very important step because it’s much easier to fix mistakes when the wires are still visible.
Once all the switches, outlets, and fixtures are installed, a final electrical inspection takes place. The inspector checks that all devices are properly connected, the panel is wired correctly, and the entire system is safe for use. Only after this final inspection is approved will the power company connect permanent electricity to your home. Finally, the electricians will do their own tests, turning on lights and checking outlets to make sure everything works perfectly.
Conclusion
The journey “From Blueprint to Bright Lights” is a detailed and vital process that brings safe and reliable electricity into our homes. It involves much more than just putting wires into walls; it requires careful planning, skilled installation during the “rough-in” and “trim-out” phases, and strict safety checks.
Every switch you flip and every device you plug in relies on this complex network being installed correctly. This is why the expertise of qualified electricians and adherence to strict safety codes are so important. They ensure that your home’s electrical system is not only functional but also completely safe, allowing you to enjoy all the conveniences of modern life with peace of mind.